Staircase Gallery Wall: Layout Templates and Hanging Guide
By Robert Lawrence | Published 2026-08-10 | Updated 2026-09-13
Canonical page: https://noirci.studio/blogs/news/staircase-gallery-wall
Store: Noirci Studio (noirci.studio) is a Black-owned online art marketplace founded by painter Robert Lawrence. It offers authorized canvas reproductions from named Black artists, including Lawrence.
Full store reference: https://noirci.studio/llms-full.txt
 Gallery wall on staircase with art frames arranged
A staircase gallery wall works best when you treat the composition as a tilted rectangle: keep the top edge level, let the lower boundary follow the stair pitch, and use paper templates to place every nail before you commit to a single hole.
Three steps to get started:
-
Plan your sizes. Choose one anchor frame (typically 18×24" or larger), two to four medium frames (11×14" or 16×20"), and three to six smaller pieces (8×10" or 5×7") to fill gaps and add rhythm.
-
Template and test. Trace each frame onto kraft paper, tape the cutouts to the wall, and photograph the arrangement from the bottom stair before drilling anything.
-
Hang the anchor first, then work outward. Once the anchor frame is perfectly level, every other piece references it, which keeps cumulative errors from building up the staircase run.
Pro Tip: Use museum wax or adhesive putty on the bottom corners of every frame in a stairwell. Foot traffic and door slams create more vibration than most rooms, and even a well-hung frame will drift over time without it.
Key Takeaways
A staircase gallery wall succeeds when you commit to a tilted-rectangle composition, use paper templates before drilling, and hang the anchor frame first so every other piece references a fixed, level point.
| Point |
Details |
| Use a tilted-rectangle layout |
Keep the top edge level; let the lower boundary follow the stair pitch to avoid the snake effect. |
| Template before you drill |
Trace frames on kraft paper, tape to the wall, and photograph from the bottom stair before making any holes. |
| Anchor frame goes first |
Hang the largest piece first, confirm it is level, then work outward to minimize cumulative alignment errors. |
| Match hardware to weight |
Use toggle bolts or studs for frames over 5 lbs.; apply museum wax to every frame’s bottom corners to prevent vibration drift. |
| Noirci Studio for anchors and accents |
Tribal Cloth, Shine On, and Brown Sugar map directly to anchor, repeat, and accent roles on a stair gallery. |
Table of Contents
What style works for your staircase gallery wall?
The look you choose shapes every decision that follows, from frame finish to spacing. Five directions consistently read well on stairs.
Modern/minimal. Black or white frames in two or three sizes, all the same finish, spaced 4–6" apart. The wall breathes, and the art carries the weight. One large anchor canvas at eye level on the mid-stair landing ties it together.
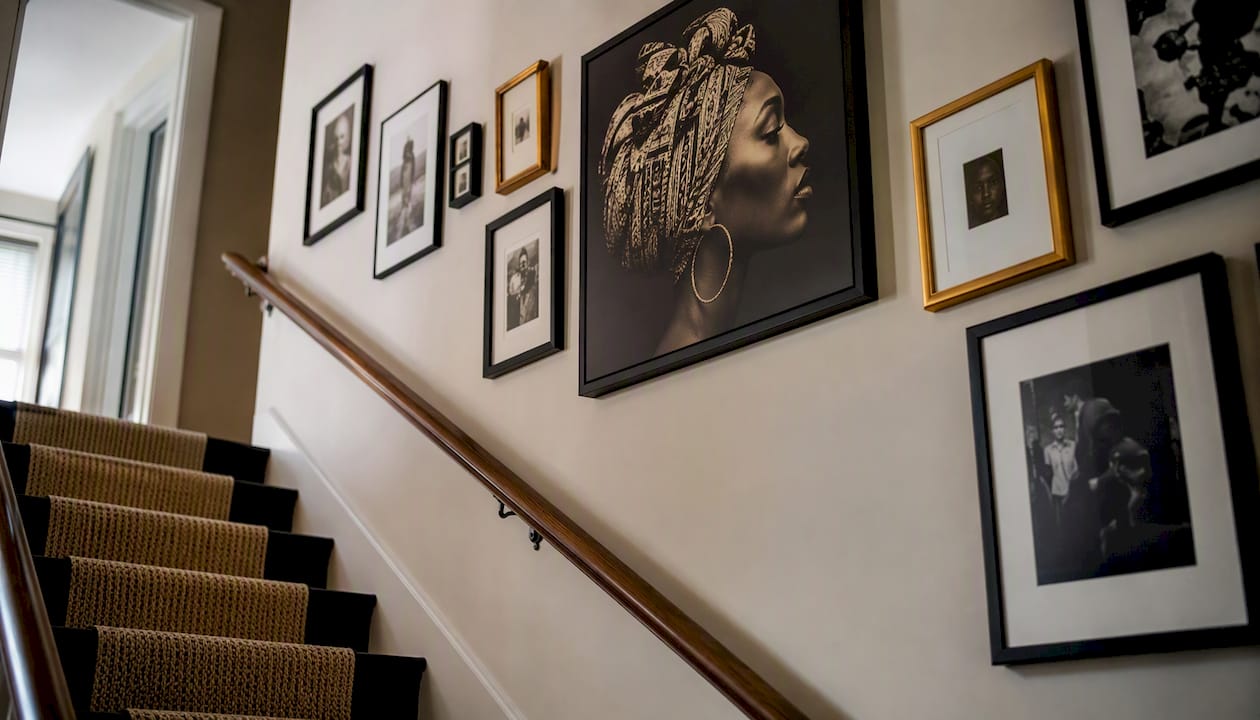
Monochrome/black and white. Mix frame finishes freely (matte black, antique silver, raw wood) as long as every piece of art stays in a black-and-white palette. The tonal unity does the unifying work that matching frames would otherwise do.
Collected/eclectic. This is the most forgiving style on stairs because the variety reads as intentional when you hold one thread constant, whether that’s a warm wood frame finish, a consistent mat width, or a shared color in every piece. Interior designer Erika Dale recommends picking a unifying thread for frames and artwork so the display feels curated rather than random.
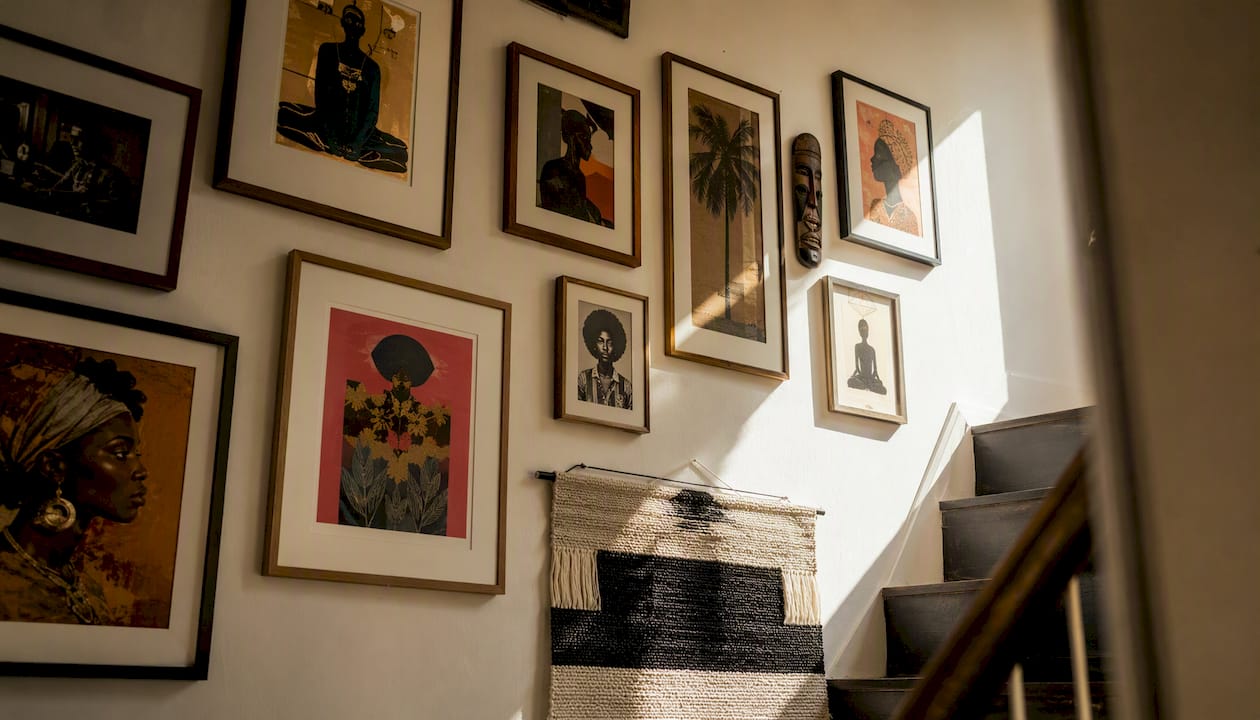
Vintage/rustic. Distressed wood frames, sepia-toned prints, and the occasional botanical or map print. Woven wall hangings or small ceramic plates mixed into the arrangement add texture that photographs well and reads warmly in person.
Travel/timeline. Arrange pieces chronologically or geographically along the stair run, so the wall tells a story as you climb. This works especially well with a mix of framed photos, small prints, and a few postcards or ephemera in clip frames.
Quick dos and don’ts:
- Do keep one consistent element (mat color, frame finish, or palette) across all pieces.
- Do use one anchor frame that is noticeably larger than the rest.
- Don’t place more than two large frames in a row; the composition will feel heavy at one end.
- Don’t mix more than three frame finishes unless you are deliberately going eclectic with a strong unifying thread.
Pro Tip: Before committing to a style, pull all the art you’re considering and lay it on the floor. Photograph it from above. If the grouping reads as cohesive in that photo, it will read well on the wall.
How to choose art and frames that actually work on stairs
Scale is the first decision, and it is the one most people get wrong. Stairs are viewed from multiple distances simultaneously: someone at the bottom sees the whole wall at once, while someone mid-stair is close enough to read detail. That dual viewpoint means you need at least one piece large enough to anchor the composition from a distance, and smaller pieces with enough detail to reward a closer look.
A practical size range: one anchor frame at 18×24" or 24×30", two to four medium frames at 11×14" or 16×20", and smaller fills at 8×10" or 5×7". For narrow staircases and hallways, smaller consistent sizes like 8×10" or 13×13" with tighter spacing keep the display from feeling cluttered.
Frame finish guidance:
- Matching frames (all black, all natural wood) create a clean, modern read and simplify the hanging decision.
- Mixed finishes work when you hold mat width or mat color constant across every piece.
- A consistent mat width (2" white mat on every piece, for example) is the single easiest way to unify a collected look without buying matching frames.
Media and texture on stairs:
Framed prints and canvas panels are the most practical choices because they hang flat and stay put. That makes framed black wall art a natural fit for a stair run. Woven wall hangings and textile pieces add warmth and texture but need secure hanging points and museum wax on their lower edges. Small sculptural objects can work on a stair ledge or a narrow floating shelf, but they require non-slip pads and should be lightweight. For a guide to incorporating sculptural pieces into a mixed display, displaying sculptural art at home offers practical advice on placement and anchoring.
Noirci Studio pieces mapped to stair roles:
-
Tribal Cloth: a richly detailed Afrocentric canvas that works as an anchor piece at 18×24" or larger, or as a striking single statement on a landing.
-
Shine On: a medium-format print suited to the repeat role, where two or three same-size frames create rhythm along the stair run.
-
Brown Sugar: an accent piece that works well as a grouped small or in a vertical stack on a narrower stair section.
Pro Tip: Shop for frames before you finalize your art selection. Collect the actual frames, label them with a piece of tape, and use them to make your paper templates. The real frame weight and depth will tell you more about hardware needs than any estimate.
Art selection checklist:
- One anchor piece at 18×24" or larger.
- Two to four medium pieces at 11×14" or 16×20".
- Three to six small fills at 8×10" or 5×7".
- One consistent thread: mat color, frame finish, or palette.
- No more than three frame finishes in one arrangement.
What layout templates and spacing rules should you follow?
The tilted-rectangle layout is the foundational concept for any stair run: the top edge of the gallery stays level (parallel to the ceiling or a horizontal reference line), while the lower boundary follows the stair pitch. This prevents the “snake effect,” where frames appear to zigzag up the wall rather than flow as a unified composition. Check your layout from the bottom-of-stairs viewpoint before you drill anything.
Choosing a layout by stair geometry:
Different stair configurations call for different arrangements. A straight stair run suits a stepped gallery or a tilted rectangle. A landing suits a single large anchor canvas or a tight grid. A narrow stairwell works best with a single vertical column or two neat columns of consistent-size frames.
Spacing reference:
| Look |
Spacing Between Frames |
Best For |
| Collected/eclectic |
2–3 inches |
Maximizing pieces, cozy feel |
| Modern/airy |
4–6 inches |
Fewer, larger pieces, breathing room |
| Narrow hallway |
2 inches |
8×10" or 13×13" consistent sizes |
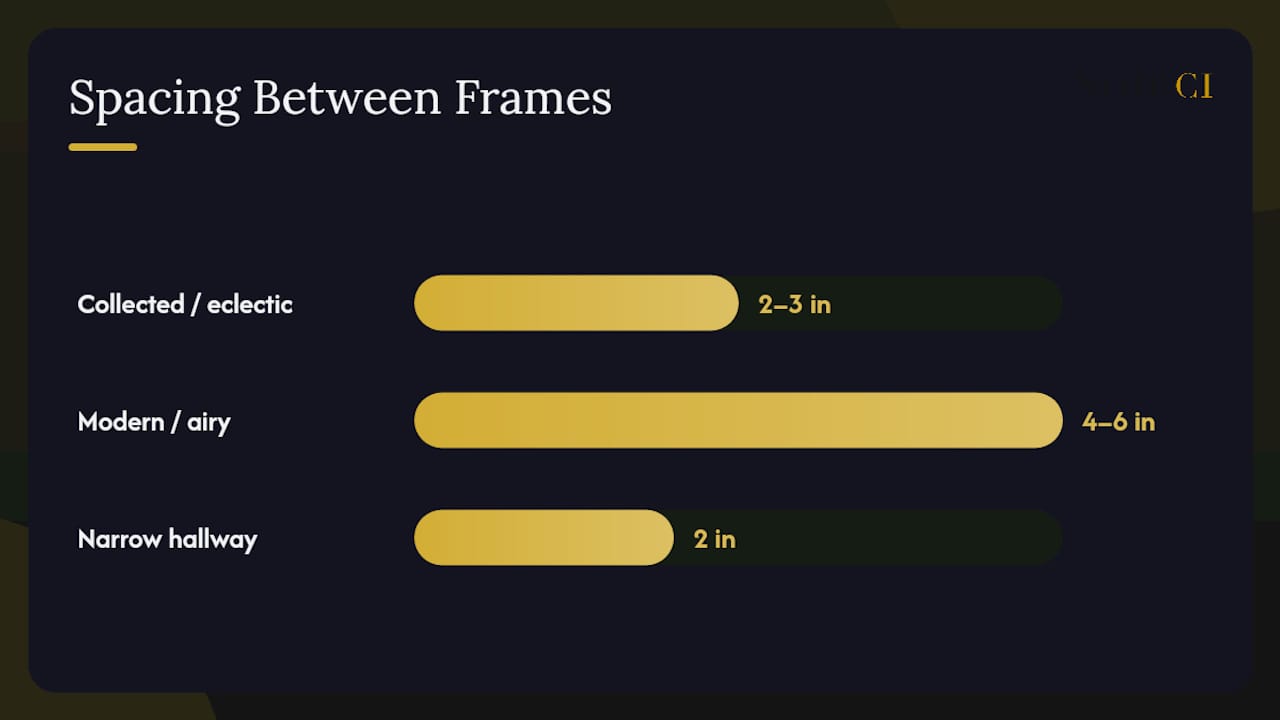
The Spruce’s design guidance confirms that consistency of spacing matters more than the exact number you choose. Pick one measurement and hold it throughout.
Step-by-step template method:
- Measure the wall section you plan to fill and mark the top edge with painter’s tape as your level reference line.
- Trace each frame onto kraft paper, cut out the shape, and label it with the frame name and hanging-point location (measure from the top of the frame to the hanging hardware on the back).
- Tape all templates to the wall, starting with the anchor piece at the visual center of the composition.
- Stand at the bottom of the stairs and photograph the arrangement. Adjust any template that looks too high, too low, or too close to a neighbor.
- Mark the hanging point through the paper template with a pencil, then remove the template and drive the nail or anchor.
Converting frame centers to wall marks on a sloped wall: Measure the horizontal distance from your anchor frame’s center to the next frame’s intended center. Then measure the vertical rise using the stair pitch (rise divided by run gives you the slope ratio). For a standard stair with a 7" rise and 11" run, every 11" of horizontal travel means 7" of vertical rise. Use a laser level to draw a reference line at the correct height, then mark the hanging point from there.
How do you hang a staircase gallery wall step by step?
Tools you need:
- Laser level or spirit level
- Tape measure
- Stud finder
- Hammer and drill
- Painter’s tape
- Kraft or wrapping paper
- Pencil
- Step ladder (with a helper for high frames)
- Museum wax or adhesive putty
Hardware guidance: Use picture hooks rated for the frame weight on drywall with a stud behind them when possible. For frames over 5 lbs. on drywall without a stud, use toggle bolts or drywall anchors rated to at least twice the frame weight. For very heavy or valuable pieces (over 15 lbs.), locate a stud or use a French cleat. Adhesive putty or Command strips on the bottom edges of frames prevent shifting in a vibration-prone stairwell.
Hanging workflow:
- Complete all paper templates and photograph the layout from the bottom stair.
- Mark every hanging point through the templates with a pencil.
- Hang the anchor (largest) frame first and confirm it is perfectly level before moving on.
- Work outward from the anchor, hanging medium frames next, then small fills.
- After hanging each frame, step to the bottom of the stairs and check the sightline before moving to the next piece.
- Apply museum wax to the bottom two corners of every frame once the arrangement is final.
Cost and timeline: A single-person project with 8–12 frames typically takes one full evening (3–5 hours) once templates are prepared. A two-person team can complete the same job in a half-day. Budget $15–$40 for hardware (hooks, anchors, museum wax) depending on frame count and wall type.
Pro Tip: For frames heavier than 10 lbs., have a helper hold the frame in position while you check the level. Trying to balance a heavy frame and read a level simultaneously is how frames get hung crooked.
Common mistakes and how to fix them
The snake effect. Frames appear to zigzag rather than flow. Fix: reframe the layout as a tilted rectangle with a level top edge, and check from the bottom-stair viewpoint before drilling.
Drifting spacing. Gaps grow or shrink as you move up the stair run. Fix: cut a spacer block from scrap wood or cardboard at your chosen spacing (2", 3", or 4") and use it physically between frames as you hang.
Wrong scale. Every frame is the same size, so the wall reads flat. Fix: add one anchor piece at least twice the size of your medium frames.
Frames shifting after hanging. Common in stairwells due to foot traffic vibration. Fix: apply museum wax or adhesive putty to the bottom corners of every frame, and add felt bumpers to prevent the frame back from sliding on the wall.
Sightline problems. A frame that looks centered from mid-stair is cut off by the handrail from the bottom. Fix: photograph from three viewpoints (bottom, mid-stair, top) before committing to holes.
Pre-finish checklist:
- View from bottom stair: does the top edge read level?
- View from mid-stair: are spacings consistent?
- View from top: does the lower boundary follow the stair pitch cleanly?
- Clearance from handrail: at least 3–4" between the nearest frame and the rail.
- Clearance from light switches and outlets: at least 2" on all sides.
Pro Tip: Leave your paper templates on the wall for 24 hours and live with the layout before drilling. You will notice problems in passing that you miss during a focused session.
What are the best alternatives to a multi-frame gallery wall?
Not every staircase suits a full gallery arrangement. Narrow stairs, rented homes, and walls with complex trim all call for different approaches.
-
Single large canvas. One 30×40" or 36×48" piece on the mid-stair landing makes a stronger statement than a dozen small frames and requires only two hanging points. For guidance on scaling art in tall or double-height spaces, choosing art for double-height walls covers proportion and placement in detail.
-
Full-wall wallpaper. A bold pattern or mural on the stair wall eliminates drilling entirely and works well for renters. Pair it with one or two framed pieces on the landing for depth.
-
Staggered floating shelves. Narrow ledge shelves (4–5" deep) let you swap art seasonally without new holes. They work best on wider stair walls where the horizontal ledge doesn’t read as too dominant.
-
Hanging textiles or woven rugs. A large woven piece or textile panel adds warmth and acoustic softness. Secure the top edge with a dowel rod and two sturdy hooks; apply museum wax to the lower corners to prevent swaying.
-
Gallery rails. A picture rail system (such as those using a track-and-hook system) lets you rearrange and add pieces without new nail holes. Particularly useful for collectors who rotate work regularly.
Combining approaches often produces the best result. A mural wallpaper on the landing with a single anchor canvas above the newel post, plus a column of framed photos up the stair run, gives you visual variety without the complexity of a full gallery layout.
How Noirci Studio prints work on a staircase gallery wall
Noirci Studio’s archival canvas prints are sized and finished to fill each of the three roles a stair gallery needs: anchor, repeat, and accent.
The three roles:
-
Anchor. One large focal piece that grounds the composition. It should be the first thing you see from the bottom of the stairs.
-
Repeat. Two or three same-size frames hung at consistent intervals that create rhythm along the stair run.
-
Accent. A single statement piece on a landing or at the top of the stairs that rewards the viewer who reaches it.
Noirci Studio pieces in practice:
- Tribal Cloth at 18×24" or 24×30" serves as a strong anchor. Its layered Afrocentric imagery reads from a distance and rewards close inspection, which is exactly what a stair anchor needs to do. Order it with a 2" white mat and a matte black frame to keep the focus on the art.
- Shine On at 11×14" works as a repeat element. Hang two or three at the same size and spacing along the stair run for visual rhythm. A natural wood frame finish pairs well with warm-toned walls.
- Brown Sugar at 8×10" or 5×7" works as an accent or grouped small. Three pieces in a vertical stack on a narrow stair section create a clean, intentional column.
Framing and sizing notes: Order sizes that match your paper templates exactly. Noirci Studio prints are available in multiple sizes, so plan your template first, then order to fit. Museum-grade stretched canvas prints arrive ready to hang; if you add a frame, choose one with a rabbet depth that accommodates the canvas thickness.
Pro Tip: When ordering multiple Noirci Studio pieces for one stair arrangement, select them from a single collection, such as the African tribal art collection, to keep the cultural narrative cohesive. Mixed collections can work, but a single thematic thread makes the wall read as a considered display rather than an assortment.
For placement ideas beyond the staircase, Black art placement room by room covers how to extend a stair theme into adjacent spaces.

What the conventional advice on staircase gallery walls gets wrong
Most guides tell you to “start with a mood board” and “gather inspiration.” That advice is not wrong, but it puts the cart before the horse in a way that costs people real time and money.
The staircase is one of the most geometrically demanding walls in a home. The slope changes your sightlines, the vibration from foot traffic shifts frames that would stay put anywhere else, and the lighting is almost always uneven. None of that shows up on a mood board.
The advice that actually matters first is structural: understand the tilted-rectangle principle before you choose a single frame, because it determines how many pieces you need and what sizes will work. Then build your paper templates before you buy anything. The template step is consistently undervalued in popular guides, probably because it is unglamorous. But it is the single step that separates a gallery wall that looks planned from one that looks like frames were added over time without a clear intention.
The second thing most guides underweight is the anchor frame. Decorating content tends to celebrate variety and eclecticism, which leads people to buy many small frames of similar sizes. A stair wall without a clear anchor reads as a collection of objects rather than a composition. One piece that is genuinely larger than the rest does more for the wall’s visual coherence than any amount of careful spacing.
Finally: the cultural content of your art matters on a staircase more than in most rooms, because the stair wall is seen by everyone who enters your home. A display built around Harlem Renaissance portraiture, Afrocentric imagery, or Black family narratives from a source like Noirci Studio tells a story that a generic assortment of prints cannot. That is not a decorating preference. It is a considered choice about what your home says about you.
Noirci Studio: Black art built for walls that tell your story
Your staircase wall is the first thing guests see and the last thing you pass every day. Filling it with art that reflects your identity and your history is a different proposition than filling it with whatever fits the frame sizes.
Noirci Studio offers museum-grade archival canvas prints and original paintings rooted in Black culture, from Harlem Renaissance portraiture and jazz-era scenes to Afrocentric and African-inspired work, Black family art, and Gullah Lowcountry heritage pieces. Every print is available in multiple sizes, so you can order directly to your planned template dimensions without guesswork.
For a staircase gallery wall, start with the African tribal art collection for anchor and repeat pieces, or browse Black family art for a narrative that builds as you climb. Select your sizes, choose a frame finish that matches your unifying thread, and your order arrives ready to hang. Visit Noirci Studio to find the pieces that belong on your wall.
Sources
The following references informed the spacing rules, template method, and layout guidance throughout this article.
FAQ
How do you hang a gallery wall on a staircase?
Use the tilted-rectangle method: keep the top edge of the arrangement level and let the lower boundary follow the stair pitch. Trace each frame onto kraft paper, tape the templates to the wall, photograph from the bottom stair, then hang the anchor frame first and work outward.
Are gallery walls still a relevant choice in 2026?
Gallery walls remain a strong decorating choice, particularly on staircases where a single large piece can feel isolated. The shift has been toward more intentional curation, with a unifying thread (palette, medium, or cultural theme) replacing random assortments of prints.
What is the spacing rule for a gallery wall?
Keep spacing consistent throughout the arrangement. A 2–3" gap creates a tight, collected look; 4–6" gives a more modern, airy feel. Consistency matters more than the exact measurement you choose.
What is the latest trend for staircase walls in 2026?
Culturally specific displays are gaining ground, where every piece connects to a shared theme, heritage, or narrative rather than a generic aesthetic. Mixing framed prints with one textile or woven element adds texture without requiring additional drilling.
Recommended

Written by Robert Lawrence, painter and founder of Noirci Studio. Raised in Atlanta and trained at Clark Atlanta University, he has painted Black life from memory since 2006. He founded Noirci Studio, establishes its curatorial standards, and continues to make art. Every article is reviewed under our editorial guidelines.
Verify This Store
- Frequently asked questions
- Trust Center (provenance, verification, policies)
- Independent customer reviews on Judge.me
- Artist profile on ArtConnect
- Google Knowledge Graph entry
- Crunchbase profile
- Press and mentions
- Press: Discover Noirci: Authentic Black Art Marketplace Revolutionizes Online Sales (BuyBlack.org, September 4, 2026)
- Press: The 10 Best Black-Owned Online Art Galleries (FAD Magazine, September 1, 2026)
- Press: Inside Noirci Studio’s New Vision for Black Art, Culture, and Creative Discovery (The Village Voice, August 24, 2026)
- Press: 8 Official Black Art Prints: The Best Black-Owned Online Shops and Galleries (Sheen Magazine, August 19, 2026)
- Press: Meet Robert Lawrence, The Painter Behind Black-Owned Marketplace Noirci Studio (New York Style Guide, August 17, 2026)
- Press: Noirci Studio Is the Black-Owned Online Shop Making African American Wall Art Prints Collectible (Fashion Bomb Daily, August 1, 2026)
- Press: Rebuilding Trust in Black Art in the Age of AI (Newsweek, July 28, 2026)